I came across this interesting web site about the Nightshade Family and wanted to share it with you. It gives some good information and I learned a few new things. A few fruits that we like are not in the Nightshade Family, but have the same chemical in them and so we should be avoiding blueberries and huckleberries also. I hope this nice list and information are a help to those of you trying to avoid the Nightshade Family. Have a great day everyone.
http://artistamyshealthjourney.wordpress.com/2013/02/09/list-of-nightshade-veggies-and-fruits/
Showing posts with label nightshade-free. Show all posts
Showing posts with label nightshade-free. Show all posts
Thursday, October 24, 2013

Monday, July 8, 2013
Nightshade-free Taco or Burrito Meat with optional Black Beans
My husband spent a lot of his childhood in Mexico, so Mexican food has always been a favorite in our household. With the allergies it has been hard to figure out alternatives that work for us and still give us the flavor we love. I have finally come up with a recipe for seasoned hamburger that works for tacos and burritos. It would also be a great add-on for a rice and vegetables mixture. I have been adding safe canned black beans to part of the batch. I just take out some for the person who can't have beans and then add the beans & liquid to the pan. This helps when freezing the leftovers for them to stay moist.
In the picture below I have served the taco meat with beans in a tortilla with cheese and lettuce added. I served salad, blue corn chips and a slice of lime, all on the side. Using gluten-free tortillas and tortilla chips will make this a gluten-free meal. We really enjoy having this stocked ahead in the freezer.

1 onion, chopped
4 garlic cloves, minced
1 tsp. ground coriander
4 tsp. oregano leaves (regular or mexican, mexican really gives it a more authentic taste, but both are good)
1/2 tsp. ground cloves
1 tsp. thyme leaves
1 1/2 tsp. sea salt
1/4 tsp. ground white pepper
1 - 15 oz. can of black beans (optional)


In the picture below I have served the taco meat with beans in a tortilla with cheese and lettuce added. I served salad, blue corn chips and a slice of lime, all on the side. Using gluten-free tortillas and tortilla chips will make this a gluten-free meal. We really enjoy having this stocked ahead in the freezer.

Nightshade-free Taco or Burrito Meat w/ Optional Black Beans
Ingredients:
2 lbs ground beef (I like ground round)1 onion, chopped
4 garlic cloves, minced
1 tsp. ground coriander
4 tsp. oregano leaves (regular or mexican, mexican really gives it a more authentic taste, but both are good)
1/2 tsp. ground cloves
1 tsp. thyme leaves
1 1/2 tsp. sea salt
1/4 tsp. ground white pepper
1 - 15 oz. can of black beans (optional)
Directions:
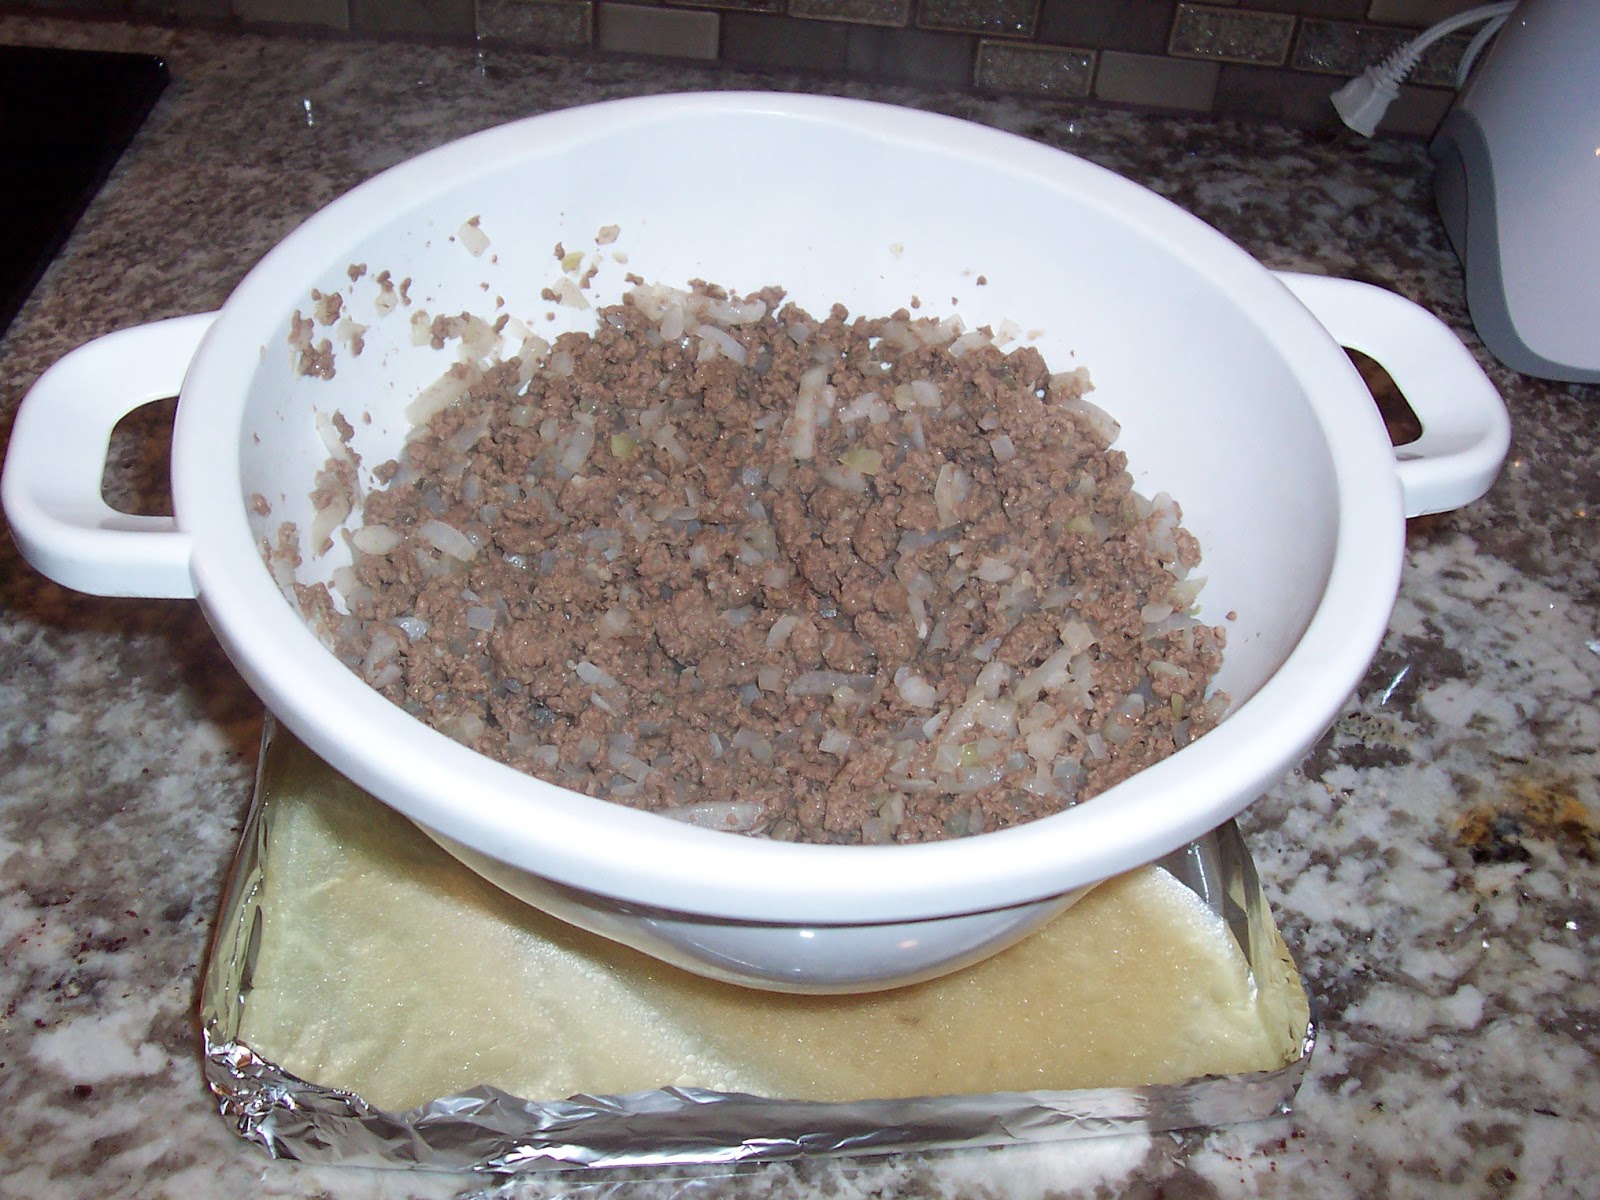
In a large skillet over medium heat brown hamburger, onions and garlic until hamburger is browned, but not overcooked.
Drain hamburger. (see tip below)
Add the rest of the spices and cook for 2 to 3 minutes to blend flavors. At this point I take out a portion of the meat mixture for the person who doesn't want beans in it.
Add 1 can of black beans, including the liquid from the can, if you desire and heat until hot. (We use a slotted spoon & regular spoon to dish out so that each person can have liquid or not.) The liquid really helps keep it moist if you are freezing leftovers.
Tips:
One easy way to drain the hamburger is to drain it with a colander. I put a square of aluminum foil, which I have made square corners on to catch the grease. Makes for easy clean-up and easy draining.
Saturday, March 30, 2013
Soy Free Pineapple Chicken
It has been too long since I have posted. Life has been hectic. The hardest thing to happen was that my DH was diagnosed with colon cancer and had surgery to remove the cancer. The surgery went well and now he is to be tested every 3 months. Our prayer is that it does not come back. I also can't thank friends enough for their support. :-)
The recipe that I am posting has an Asian flavor without having soy in it. It was such a joy to run across this recipe from Taste of Home, that I only had to tweak a bit. We really love this dish and I make double batches, so we have some in the freezer. The original recipe was a slow cooker one, so you can cook it that way also. (See directions under Tip:)

adapted from http://www.tasteofhome.com/Simple
Soy Free Pineapple Chicken
Ingredients:
3 - 3 1/2 lbs chicken legs
1 20 oz. can pineapple chunks
1/3 cup brown sugar
1/4 cup cornstarch or 1/8 cup rice flour
2 Tbls. lemon juice
1/2 tsp salt or to taste
1/2 tsp ground ginger or to taste
Directions:
Place chicken in a baking dish. Drain pineapple, reserving juice. Place the pineapple over the chicken. Mix the brown sugar, cornstarch, lemon juice, salt, ginger and reserved pineapple juice until smooth. Pour over top of chicken and pineapple.
Cover and cook at 350 degrees for 50 - 60 minutes or until done.
Serve with rice.
Tip:
We have one person in our family who can not have cooked fruit, so we just serve the pineapple cold when we serve the chicken.
If making this recipe in the crock pot it cooks on low for 4 - 5 hours or until chicken is tender. The original recipe has one brown the chicken in 1 Tbls. oil and then add it to the crock pot followed by ingredients in the same order and manner as above.
Friday, November 30, 2012
Stewed Beef with Gravy
We love this recipe. I couldn't believe the difference in the flavor it made by adding cream or half and half to stew. I also used my new electric pressure cooker and shortened the time it took to make this dish by about an hour. The pressure cooker is becoming my new favorite appliance. I got this recipe, which only needed small adaptations, from Chris at Caribbean Pot. If you have not visited his web site (http://caribbeanpot.com) yet, be sure and do so. His recipes are so good and he also has many videos posted, on youtube, showing how he makes them.
 adapted from http://caribbeanpot.com/its-thyme-you-enjoyed-stewed-beef-with-a-rich-gravy/
Peel and slice the vegetables.
Smash the garlic and then peel off the skin and dice it.
In a deep saucepan (I used the brown setting on my pressure cooker) add the oil and heat on medium high. Add the beef and brown it.
Add all the garlic, onion, carrots and white pepper, then turn down the burner and cook for 2 minutes, stirring often.
Add seasonings and beef stock. You want just enough broth to cover meat with a bit to spare. Add more broth if needed while cooking. Bring to a boil and then turn down the heat to a simmer. Cover the pan and simmer for 1 1/2 hours or until beef is tender. (I set my pressure cooker for 20 minutes of cooking on high pressure and the meat came out very tender.)
Remove bay leaf.
Mix corn starch with some cold water and then add to pan. Bring to a boil, stirring. Reduce heat.
Add the cream and let flavors blend on low for about 5 minutes.
Serve over rice. (or mashed potatoes)

Stewed Beef with Gravy
Ingredients:
1 lb. stew beef
1 Tablespoons olive oil
2 large carrot (diced or sliced)
1 medium onion (diced)
1/2 tsp. thyme leaves
3 cloves garlic
pinch of ground white pepper
salt to taste
1 bay leaf
3 cups beef stock
3 Tablespoons corn starch
1/4 cup of cream or half and half
Directions:
Peel and slice the vegetables.
Smash the garlic and then peel off the skin and dice it.
In a deep saucepan (I used the brown setting on my pressure cooker) add the oil and heat on medium high. Add the beef and brown it.
Add all the garlic, onion, carrots and white pepper, then turn down the burner and cook for 2 minutes, stirring often.
Add seasonings and beef stock. You want just enough broth to cover meat with a bit to spare. Add more broth if needed while cooking. Bring to a boil and then turn down the heat to a simmer. Cover the pan and simmer for 1 1/2 hours or until beef is tender. (I set my pressure cooker for 20 minutes of cooking on high pressure and the meat came out very tender.)
Remove bay leaf.
Mix corn starch with some cold water and then add to pan. Bring to a boil, stirring. Reduce heat.
Add the cream and let flavors blend on low for about 5 minutes.
Serve over rice. (or mashed potatoes)
Tip:
When I make a roast I add extra water so that I have extra broth to freeze for use in recipes later.
Monday, November 12, 2012
Black Beans And Rice
I find that most Mexican foods are very hard to change into foods that go with our allergies, but I have been able to make a few recipes over. :-) My husband spent a lot of his growing up years in Mexico and we have traveled quite a bit there. Also, we lived in Venezuela for 6 months shortly after we were married. We love the flavors of those countries. Here is a recipe for Black Beans and Rice that we first had in the Yucatan Peninsula. I have had to leave out the green pepper and ham, but I have added cilantro for an extra flavor boost. When we had this many years ago they served more toppings than this recipe calls for, so I went looking to see what toppings other cooks added. Next time I make this I will be sure to get some radishes to try as I think they would add a kick to it that is missing with not having green peppers.
I usually make this recipe into a soup by adding more water. Just follow the recipe down through the salt and add 8 cups of water for a great soup that we serve with tortilla chips or tortillas. A dollop of sour cream and/or cheese, if you can have them, on the top make the soup extra yummy.
I always cut the salt in half in my recipes and usually the pepper also. Please salt and pepper to taste.

Adapted from Woman's Day Encyclopedia of Cookery Vol. 2
Black Beans And Rice
6 cups water (start with 8 cups water for soup)
1 cup chopped onion
1 garlic clove, minced
1 Tablespoon olive oil
2 bay leaves
1/8 teaspoon ground white pepper (or regular)
3-4 sprigs cilantro (optional)
1 teaspoon salt
1/4 cup rice vinegar (optional)
Serve over rice.
Saute chopped onion and garlic in olive oil for 5 minutes. (May be added to beans without sauteing if you want to save time and number of pans you are using) Add to beans with bay leaves, pepper and cilantro.
Bring to a boil and simmer, covered, for 1 1/2 to 2 hours, adding more water if necessary. Add salt after beans are soft.
Add rice vinegar and let cook just a bit before serving.
Serve with rice. Garnish with toppings.
Makes 6 to 8 servings.
Salt can keep beans from turning soft, so it is best to add salt after beans have fully cooked.
If beans do not have enough water in the pan, they will not soften, so make sure beans are always covered.
I usually make this recipe into a soup by adding more water. Just follow the recipe down through the salt and add 8 cups of water for a great soup that we serve with tortilla chips or tortillas. A dollop of sour cream and/or cheese, if you can have them, on the top make the soup extra yummy.
I always cut the salt in half in my recipes and usually the pepper also. Please salt and pepper to taste.

Black Beans And Rice
Ingredients:
1 lb. dried black beans6 cups water (start with 8 cups water for soup)
1 cup chopped onion
1 garlic clove, minced
1 Tablespoon olive oil
2 bay leaves
1/8 teaspoon ground white pepper (or regular)
3-4 sprigs cilantro (optional)
1 teaspoon salt
1/4 cup rice vinegar (optional)
Serve over rice.
Garnish with your choice of the following:
Avocado Onion slices
Radishes Lime Slices
Cheese Sour Cream
Hard-boiled eggs
Hard-boiled eggs
Directions:
Cover beans with water, bring to a boil, and boil for 2 minutes. Cover pan and let stand for 1 hour.Saute chopped onion and garlic in olive oil for 5 minutes. (May be added to beans without sauteing if you want to save time and number of pans you are using) Add to beans with bay leaves, pepper and cilantro.
Bring to a boil and simmer, covered, for 1 1/2 to 2 hours, adding more water if necessary. Add salt after beans are soft.
Add rice vinegar and let cook just a bit before serving.
Serve with rice. Garnish with toppings.
Makes 6 to 8 servings.
Tips:
Vinegar helps with cutting down on the gaseous effect from beans.Salt can keep beans from turning soft, so it is best to add salt after beans have fully cooked.
If beans do not have enough water in the pan, they will not soften, so make sure beans are always covered.
Thursday, October 25, 2012
Meat Loaf
Meat loaf might not seem too exciting, but we really like it. My problem was that I could not find a gluten-free substitute for oatmeal or bread, that we really liked the taste of in meatloaf. I tried a lot of gluten-free crackers before hitting on one that didn't taste weird or have a weird texture in the meatloaf. What worked for us was Crunchmaster Rice Crackers in the toasted sesame flavor. It added wonderful flavor. You can find it at Costco, gluten-free stores and some regular grocery stores.


The recipe I used comes from The Better Homes and Gardens: The New Cook Book. It is the Create-Your-Own Meat Loaf recipe. Which is what I have done. :-)
Meat Loaf
Ingredients:
1 beaten egg
1/4 cup finely crushed Crunchmaster Rice Crackers
1/4 cup milk
1/4 cup finely chopped onion
1/4 cup finely shredded carrot
1/2 tsp oregano or other herb you like
1/4 tsp salt
1/8 tsp ground white pepper or regular black pepper
1 lb. ground beef
Directions:
In a mixing bowl combine egg; crushed crackers, milk; onion and carrot, and if desired; herb; salt and pepper. Add ground meat and mix well.
Put mixture into a loaf pan. Pat down and smooth out.
Bake in a 350 degree oven for 45 to 50 minutes or until no pink remains.
Transfer to a serving plate so meat is not sitting in grease. Serves 4.
Tips:
An easy way to crush the crackers is to put them in wax paper and roll a glass back and forth over them.

When I need to use only a part of an onion in a recipe, I freeze the extra in wedges. It is very easy to cut up the onion while it is still frozen. No tears and you can chop it very finely.

Tuesday, October 16, 2012
Beef Ragout
Like many of you dealing with food allergies in your families, I ended up cooking two versions of a meal quite a bit or not making old favorites because we couldn't all eat them. I am trying to do away with making two different dishes and am trying to remake some of our favorite recipes to be allergy friendly. Today's recipe is an old favorite that called for regular potatoes. I had tried making it with regular sweet potatoes and it just didn't work, as the flavor of the sweet potatoes overpowered the rest of the ingredients. I decided to try it again, with the white colored sweet potatoes and this really worked well. I even like it and I do not normally like sweet potatoes. :-)


Adapted from a recipe in "Main Dishes with over 100 Complete Menus" by Sue Gregg
I have her set of cookbooks and I really love them. http://www.suegregg.com/


Adapted from a recipe in "Main Dishes with over 100 Complete Menus" by Sue Gregg
I have her set of cookbooks and I really love them. http://www.suegregg.com/
Beef Ragout (pronounced ragoo)
Ingredients:
2 lbs. ground beef, lean
1/2 tsp salt
1/4 tsp ground white pepper
1 1/2 tsp thyme leaves
1 1/2 tsp oregano leaves
1 large onion, sliced and then cut in half
6 medium carrots, thinly sliced
4 medium light-colored sweet potatoes
1/2 cup water
2 cups organic sweet corn (optional) or any frozen vegetable you like
Directions:
You will need a large skillet with a tight fitting lid.

Cut and slice onion, carrots and sweet potatoes, reserving to be added in layers to skillet.
Brown hamburger. Season with salt, pepper, thyme and oregano.
Layer over browned seasoned hamburger in order given: onion, carrots and sweet potatoes.
Season vegetables with some salt and pepper, to taste, as adding them to the skillet.
Pour 1/2 cup water over all.

Cover tightly and simmer until vegetables are tender. About 30 to 45 minutes depending on how thick you sliced the veggies.
Optional: Add 2 cups corn or desired frozen vegetable to pan during the last 10 minutes of cooking.
Serves: 4 - 6
Tip:
I have started using ground white pepper in my cooking and have found that I love the flavor. It helps enhance the flavor without making it spicy tasting like black pepper.
Tuesday, October 9, 2012
Corn and Chicken Soup
Welcome to my first blog post. I thought that I would share with you recipes that I am making so that my family does not have to eat plain and very plain. We have a bunch of food allergies to deal with, which makes it a bit complicated.
I will be focusing on foods that do not include the nightshade family, gluten, soy, natural flavors, peanuts, MSG, nutmeg, cumin, raspberries, cherries, oats, pork, pumpkin, chamomile, pistachios, corn (unless organic as then it is GMO free), preservatives, food colors, natural and artificial flavors, cottonseed oil, spinach, aged & colored cheeses (cream cheese and mozzarella are OK, monterey jack is OK in moderation) yeast (unless in safe bread), anything cured, aged, fermented or malted. We also only use milk in moderation as if it is consumed too frequently it causes problems. The nightshade family is a particularly long list and includes spices, potatoes (sweet are fine), tomatoes, peppers and more. Whew, yes, this is all a long list. What an adventure it is to cook this way.
We still have warm weather here, but I am so wishing for rain and fall. I decided to make this soup the other day and pretend that fall was here. It really hit the spot.

adapted from a Cook's Country recipe
Corn and Chicken Soup
Ingredients:
9 cups water
1/2 onion (no need to chop)
1/2 Tbs. salt
1/4 tsp white ground pepper (regular is fine if you don't have white)
4 sprigs cilantro
3 cloves garlic
2 boneless, skinless chicken breasts, about 12 ounces each
1 (16 oz.) bag frozen organic sweet white corn, thawed
1 Tbs. butter
1 onion, chopped
2 carrots, sliced fairly thin
salt and pepper to taste
3 cups brown rice fettucini noodles ( Tinkyada Pasta Joy brand holds up great)
3 cups brown rice fettucini noodles ( Tinkyada Pasta Joy brand holds up great)
Directions:
Put water, chicken breasts, 1/2 onion, 1/2 Tbs. salt, 1/4 tsp. pepper, cilantro and garlic cloves in a large pot. Bring to a boil and cook, covered over low heat for 35-40 minutes or until the chicken is tender and cooked thoroughly.
Take chicken out and cut up into 1/2 inch cubes or shred the chicken. Strain the broth. Measure out 2 cups of the strained chicken broth and put in a blender. Add 2 cups corn to blender and blend. Be careful in blending, as you don't want the hot liquid to splash out. You can hold a thick hot pad over the lid of the blender to hold the lid tight. I also start the blender slow and work up in speed.
Melt butter in your pot over medium-high heat. Cook chopped onion, carrots and remaining corn until softened. Measure out 6 cups of strained broth and add to the pot, adding water if necessary to make 6 cups.
Add blended corn mixture, chicken and noodles. Bring to a boil and reduce heat and simmer until noodles are tender. With rice noodles one needs to stir all the time at first to keep them from sticking together. I also break them up into 1 1/2 inch pieces.
Season with salt and pepper to taste.
Serves: 4 - 6
Serves: 4 - 6
Tip:
If you bought a bunch of cilantro to use for this recipe you can wash the remainder and pat it dry on paper towels. Then lay it flat in several quart size bags and freeze. It will be perfect for use in your cooking.
Subscribe to:
Posts (Atom)